

Have questions about paid ads, campaign optimisation, or platform features? Browse our knowledge base for step-by-step guides, FAQs, and expert insights to help you succeed.
Creating a blog post
On This Page
A post is a dated article that joins a list, newest first. A page is a permanent part of your site, like About or Contact. Your news, articles and updates are posts. Everything on this page is the classic WordPress editor, which is what your site uses, and it is a simpler screen than most of what you will find if you search for help online.
Most WordPress advice online will not match your screen. WordPress has two editors. Yours is the classic one, which we deliberately keep across every site we build, because it is more predictable and it does not fight the page builder. If a tutorial you found shows blocks being dragged around and a black sidebar, you are reading about the other one. Follow this page instead.
Before you start
Have these ready and the whole job takes ten minutes:
- Your text, written wherever you normally write.
- One image for the top of the post, about 1200 pixels wide. See preparing an image before you upload it.
- A rough idea which category it belongs in.
Step one: open a new post
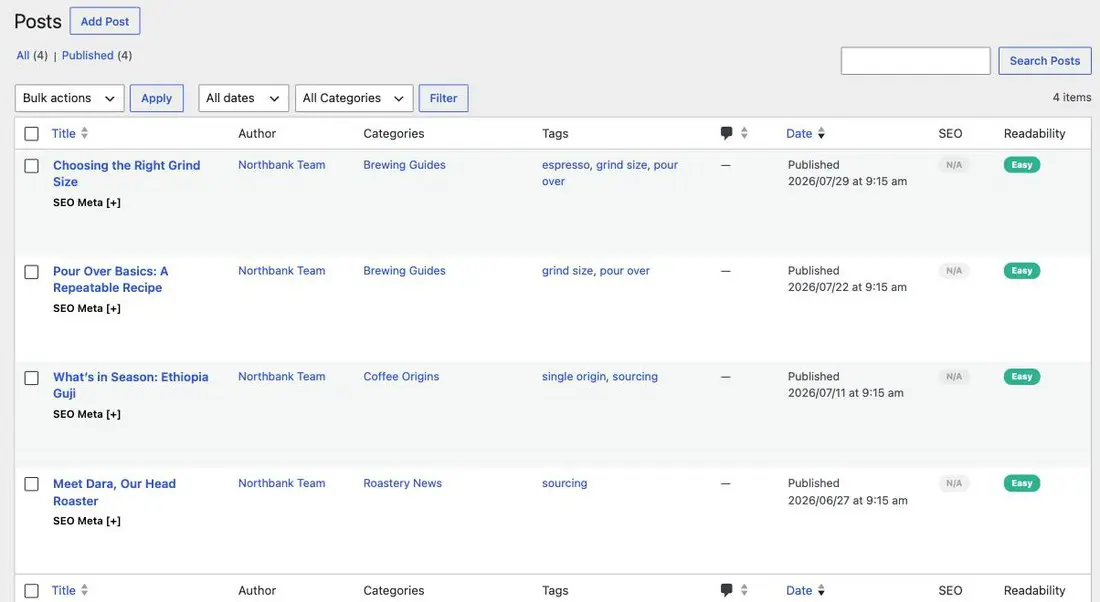
- In the left-hand menu of your dashboard, choose Posts. You will see everything published so far.
- Choose Add Post at the top.
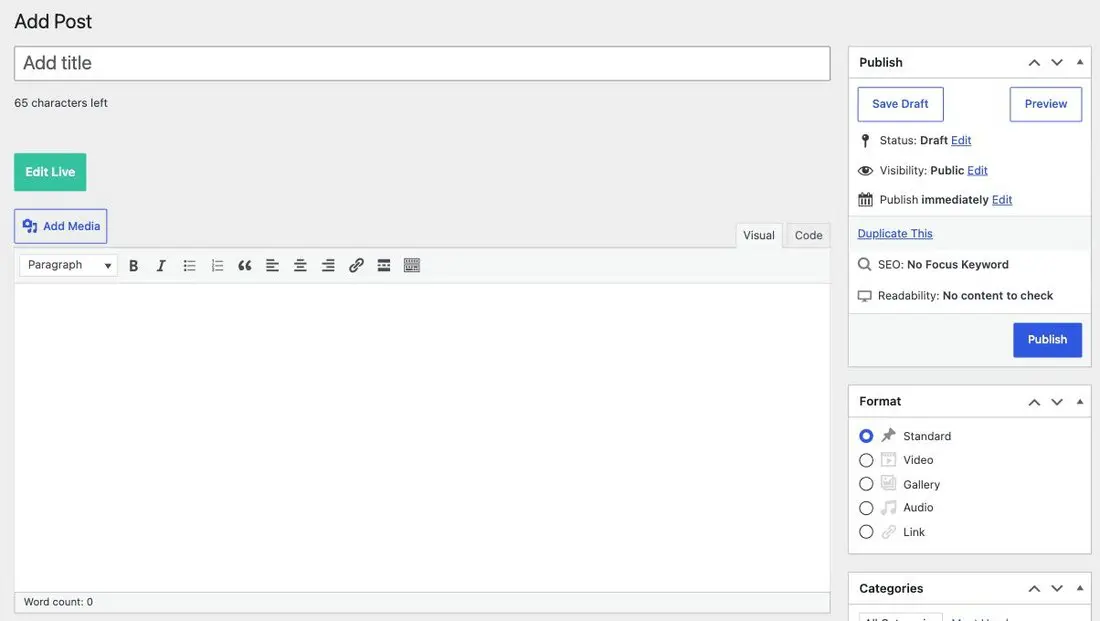
Ignore the green “Edit Live” button on posts. That opens the page builder, which is for designing pages, not for writing articles. On a blog post it will make a simple job complicated and can wrap your text in layout it does not need. Write in the box below it.
Step two: title and text
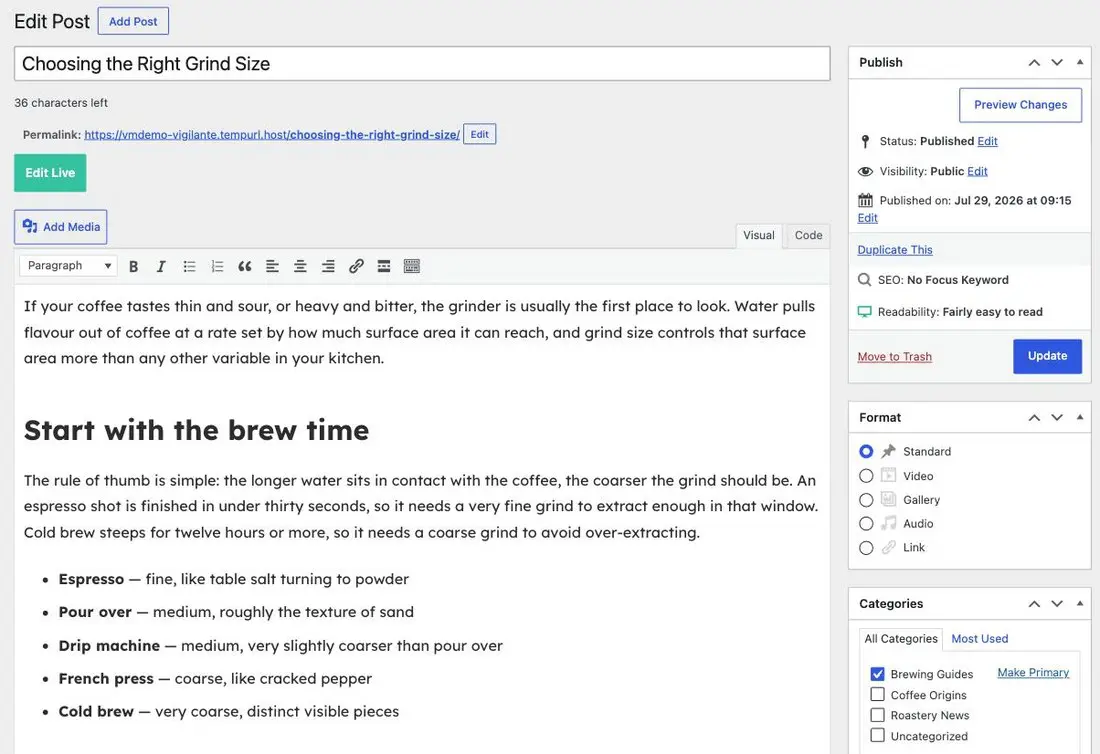
- Type your title in the top box. Write it for a human deciding whether to read: “Choosing the right grind size” beats “Grind size”. WordPress builds the web address from it, so get it roughly right before publishing.
- Write or paste your text into the large box below. If you are pasting from Word or Google Docs, paste with Cmd+Shift+V on a Mac or Ctrl+Shift+V on Windows to strip the hidden formatting that comes with it. Pasting normally is the single most common cause of a post that looks wrong and cannot be fixed by editing.
- Break it up. Use the dropdown on the left of the toolbar to make a line a Heading 2 every few paragraphs. Bold, italic, bullets and numbered lists are the buttons beside it. Nobody reads an unbroken wall of text.
- Add images inside the text with Add Media, having put the cursor where you want the picture to sit.
Step three: the right-hand column
Three things there matter, and all three are quick.
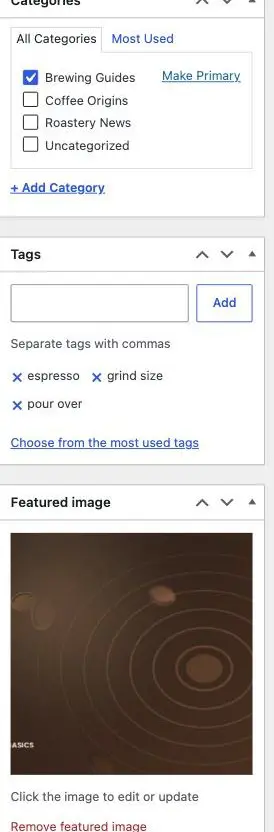
- Categories. Tick one, occasionally two. Categories are the handful of broad topics your blog is organised around, and they usually appear as filters on your site. Use the ones already there rather than inventing new ones; a blog with thirty categories has none. Categories and tags explained covers the difference properly.
- Tags. Optional, and honestly skip them unless you already have a tagging habit. They are finer-grained labels. A post with no tags is fine; a site with four hundred one-off tags is a mess.
- Featured image. Do set this. It is the picture that represents the post in the blog listing, and it is usually what appears when the post is shared on social media or in a newsletter. Without one, your post shows up as a blank rectangle in every one of those places. Choose Set featured image, then upload or pick from the library. Setting a featured image has the sizing and cropping detail.
The excerpt box, if you want it
The excerpt is the short summary shown in the blog listing instead of the first few lines. It is hidden by default. To turn it on, open Screen Options at the top right of the screen and tick Excerpt. It stays on from then.
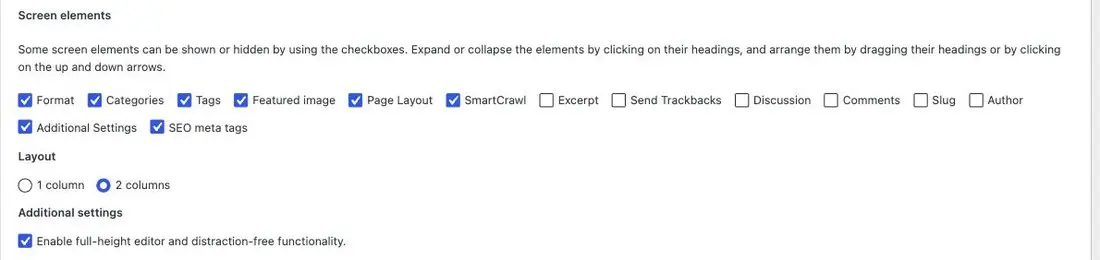
If you leave it empty, WordPress uses the opening of your post, which is usually fine. Write one when your first paragraph makes a poor summary on its own, and see writing a good excerpt for what to put in it.
Step four: preview, then publish
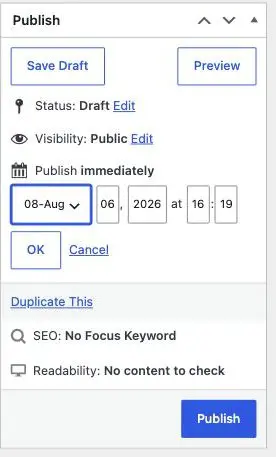
- Save Draft first. Nothing is public until you publish, and a draft is safe to leave for days.
- Preview opens the post as a visitor sees it, in a new tab. Always do this. Spacing and image sizes never look quite the same in the editor.
- Publish when you are happy. It is live immediately.
To publish later instead, click Edit beside “Publish immediately”, set a date and time, choose OK, and the button changes to Schedule. Useful for going out on a Tuesday morning without being at your desk. Scheduling a post to publish later covers the rest.
After it is live
- Editing is the same screen. Posts, find it, make the change, Update. Editing or updating an existing post covers revisions and unpublishing.
- Avoid changing the title heavily after publishing, because the web address does not follow it and anyone who shared the old link keeps the old wording. Tell us if a published post needs renaming properly.
- It will not always appear on the home page immediately. Some listings are cached for a few minutes. If it is still missing after ten, tell us.
If it does not go to plan
- The text looks wrong and will not behave. Almost always pasted formatting. Select the affected part, use the clear-formatting option, and retype the emphasis.
- The post is not in the blog list. Check it says Published rather than Draft or Scheduled, and that it has a category.
- The picture looks stretched or fuzzy. The image was too small or the wrong shape. See preparing an image before you upload it.
- You accidentally published a draft. Set Status back to Draft and choose Update. It disappears from the site straight away, and it is not the end of the world.
What we need if something fails
The post title and what you were doing. If the layout looks broken, tell us whether you pasted the text in from somewhere, because that answers it about nine times out of ten.
Related
Still haven’t found what you’re looking for?
Let us know and we’ll do our best to help out!