You can do basic image editing in the WordPress admin area, including image cropping, rotating, scaling image sizes, and flipping them vertically or horizontally.
These features come in handy when you are away from your main computer and uploading images on the go. WordPress allows you to quickly resize images without using image editing software.
Editing Images in WordPress Admin Area
The first thing you need to do is upload your image to WordPress. You can upload an image via post editor while writing a post, or by visiting the Media » Add New page.
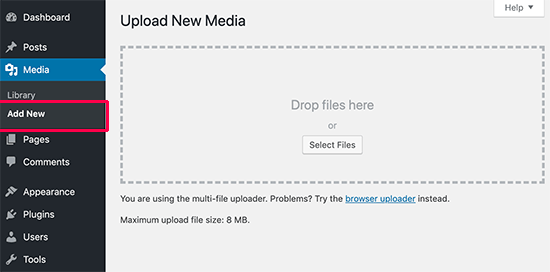
Once you have uploaded an image, you need to visit Media » Library page. Now locate the image you just uploaded and click on it.
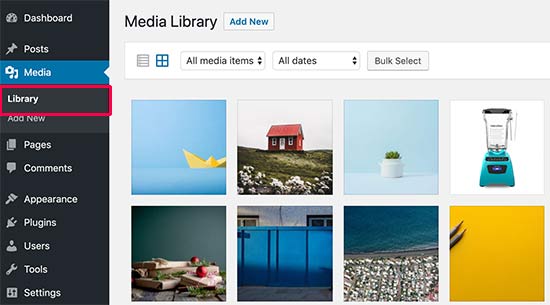
This will open the image in a popup window. You will see image details in the right column and an image preview on the left.
Now there are two ways to open the image with the built-in WordPress image editor.
The first option is to click on the ‘Edit image’ button below the image preview which will open the image editor inside the popup. The second option is to click on the ‘Edit Image Details’ link
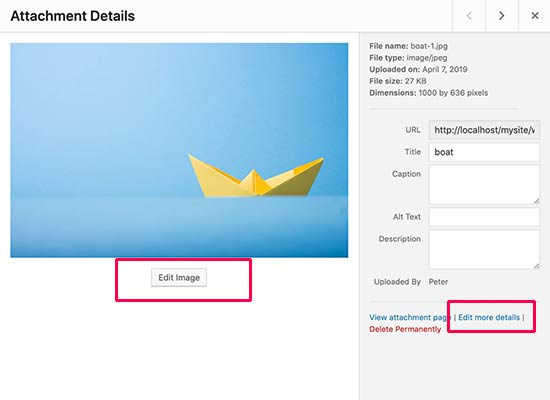
Clicking on the edit image details link will close the media popup and take you to the Edit Media page.
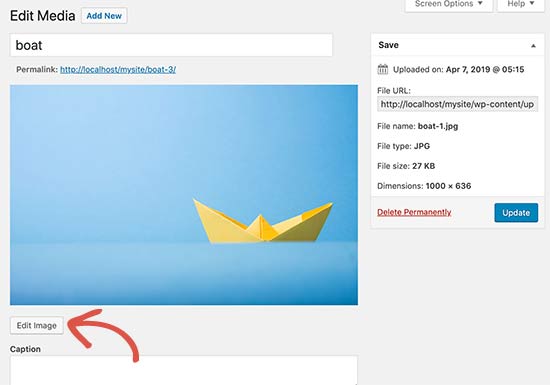
From here you can click on the ‘Edit Image’ button below the image preview. This will open the image editing screen.
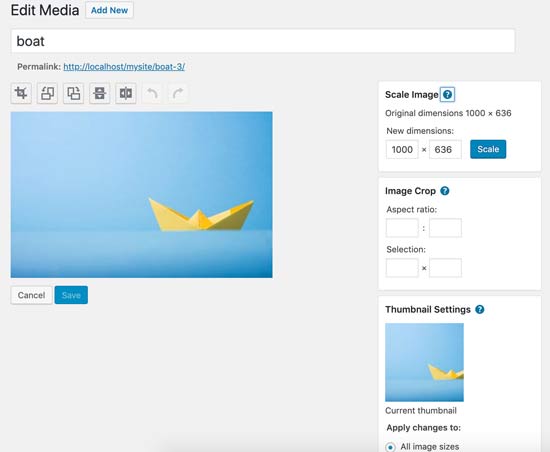
You will see a toolbar with some buttons on top of your image. On the right column, you will see a bunch of options to resize the image.
Let’s take a look at what each of these options does and how to use them to edit your image in WordPress.
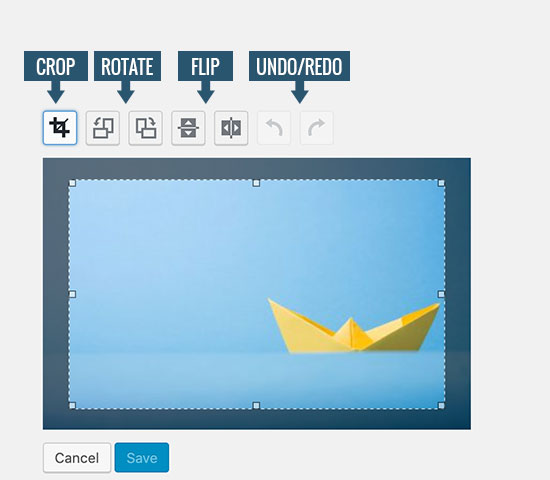
1. Crop – It allows you to crop images simply click the button and then select the image area you want to crop out of the original image.
2. Rotate – The two rotate buttons allow you to rotate an image clockwise and counter-clockwise.
3. Flip – The flip buttons allow you to flip an image horizontally or vertically.
4. Undo / Redo – If you don’t like a change you made, then simply undo your changes or redo them to revert back.
Now let’s look at the options you have in the right column of the image edit screen.
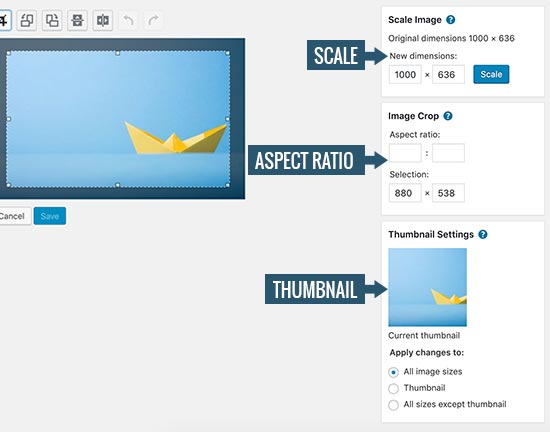
1. Scale Image – You can use this option to manually scale the image keeping the original proportions. Use this option before cropping an image otherwise you may not be able to keep the image proportions.
Note: You can only scale down an image in WordPress. You cannot make images larger by increasing the image dimensions.
2. Aspect ratio – If you want to keep a certain aspect ratio intact then this option allows you to set it. After that, you can click on the crop button to select an area while using the ratio you defined.
3. Thumbnail settings – From here you can choose whether you want to apply these changes to all image sizes, just the thumbnail, or all image sizes except the thumbnail. Keep in mind that this thumbnail is the smallest image size created by WordPress for this image. It is not the same as the featured image or post thumbnail.
Once you are satisfied with the changes you have made, don’t forget to click on the Save, Scale, or Update button to save your changes.
WordPress will apply your changes to the image and create a new copy of the image on your server.
How to Restore Original Image After Editing
If you’re not happy with the edited image, then you can easily revert back to the original version. Simply edit the image again, and this time you will notice a new meta box labelled ‘Restore original image’.

Click to expand it and then click on the ‘Restore image’ button. WordPress will now restore your original image, and you will be able to edit it again or leave it as is.
