After submitting a form in Gravity Forms, users typically see a default confirmation message thanking them for their submission. This article guides you through customizing that confirmation message. You’ll learn how to change the default message and create custom confirmations based on the submitted content.
Editing or Creating a Confirmation
If you haven’t created a form yet, check out our article on creating forms to get started. If you already have a form ready, follow these steps to access the form confirmations:
- Access your form by clicking on “Forms” from the left-side navigation menu, then click on the title of the form you want to modify the confirmation message for.
- Hover over “Settings” on the top menu, and click on “Confirmations.”
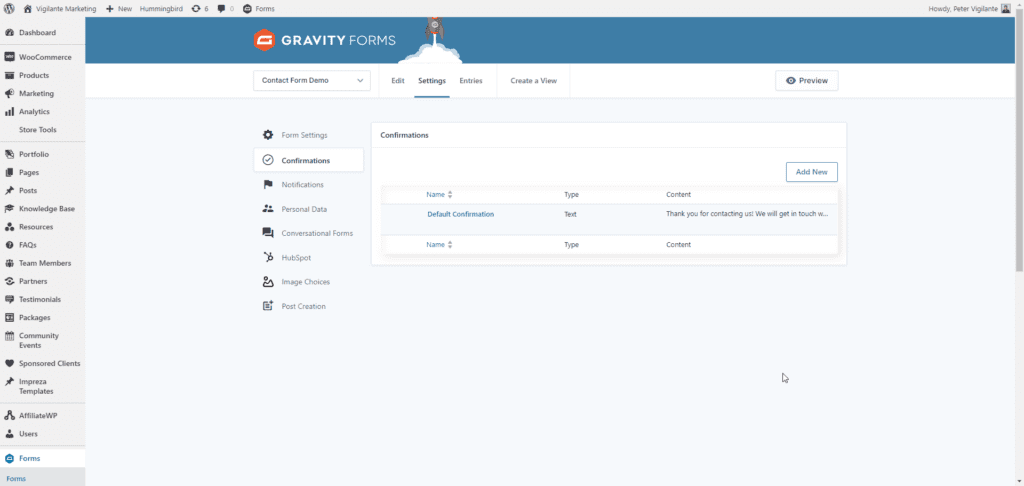
- You’ll see a list of available confirmations. To edit an existing confirmation, click on its title. To add a new confirmation, click the “Add New” button.
Confirmation Settings Reference
When editing a Confirmation, the following settings are available:
| Setting | Description |
|---|---|
| Confirmation Name | To help identify the confirmation in the confirmation list. Name is not displayed to the user. |
| Confirmation Type | Options are Text, Page, and Redirect. See below for more information on each. |
| Message | This is displayed to the user upon form submission. |
| Conditional Logic | Configure more granular conditions that must be met in order to display this confirmation. |
Confirmation Type: Text
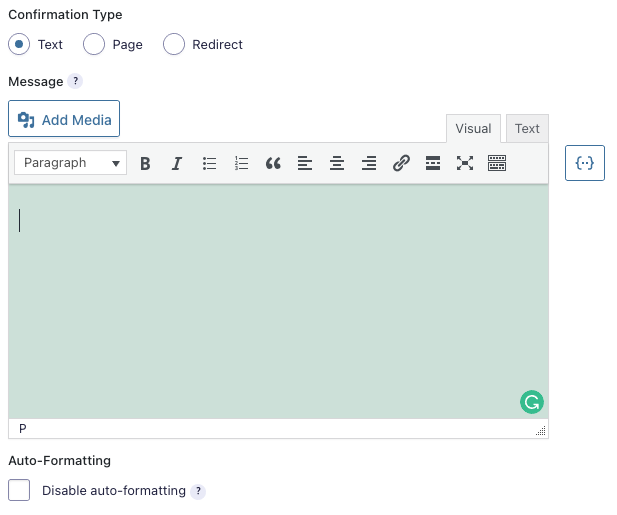
Text confirmations let you display a message to users upon submission, making it an ideal and popular way to thank them.
Configuring a standard text notification is simple. Select the “Text” option and start writing your confirmation message in the box provided. Use the “Add Media” button to include an image or video. If you prefer to disable the automatic formatting of the text, check the box labeled “Disable Auto-formatting.”
Confirmation Type: Page
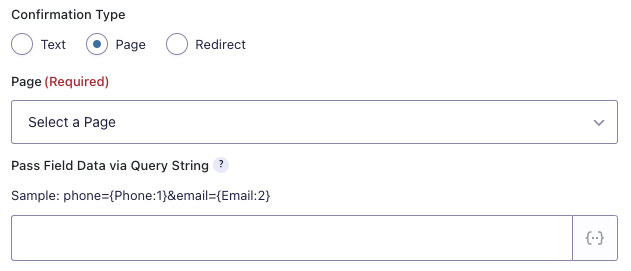
With the “Page” setting in the Confirmation Type options, you can direct users to a specific page on your site after they submit the form. To set up your confirmation page, use the dropdown labeled “Page” to select the desired page.
Note: The list of pages in the "Page" dropdown relies on the WordPress REST API. If the REST API is disabled by a security plugin or other method, the dropdown may not display all the pages on your site.
With a custom confirmation page option, you can also send form data to the page. For example, if you want the page content to change based on the submitted form information, add merge tags to the “Pass Field Data via Query String” box. Example:
phone={Phone:1}&email={Email:2}
Note: Avoid using parameter names from this list of reserved WordPress terms. One commonly used parameter that is a reserved term is 'name,' which will result in a 404 Not Found error.
Confirmation Type: Redirect
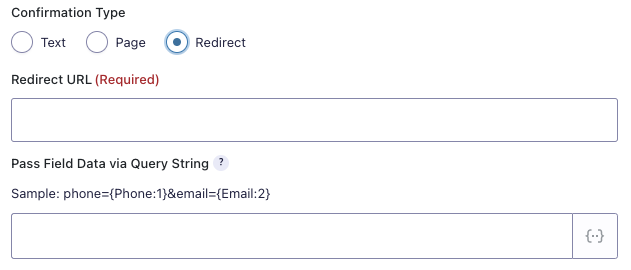
If you want to redirect the user to another location, such as an external site, after submitting the form, you can set the “Redirect” option. To do this, select “Redirect” as the Confirmation Type, and enter the full URL you want the user to be redirected to in the “Redirect URL” field.
Similar to the page confirmation type, you can pass form information via a query string in the URL. Add merge tags to the “Pass Field Data via Query String” field. To make this easier, use the Merge Tag Tool {..} located next to the field.
Note: Avoid using parameter names from this list of reserved WordPress terms. One commonly used parameter that is a reserved term is 'name,' which will result in a 404 Not Found error if your Redirect URL is for a WordPress website.
Changing the Default Confirmation Message
To display a custom confirmation message, you can edit the Default Confirmation or create a new one with conditional logic enabled. The Default Confirmation will be used if the logic fails on additional confirmations. Since the form always needs to process one confirmation, the Default Confirmation cannot be deleted, removed, or deactivated.
If you want to use the same confirmation for all users submitting the form, customize the Default Confirmation. If you want to show different confirmations based on conditional logic, add as many new confirmations as needed and configure their conditional logic accordingly.
For more advanced information on confirmation messages, refer to this article on confirmation message conditional logic. This article explains how to display different confirmation messages based on specific form conditions.
Looking for Email Confirmation?
Gravity Forms uses the term “Notification” to refer to emails sent after form submission or other events. For all the settings related to notifications, please see our Configuring Notifications knowledge base article.
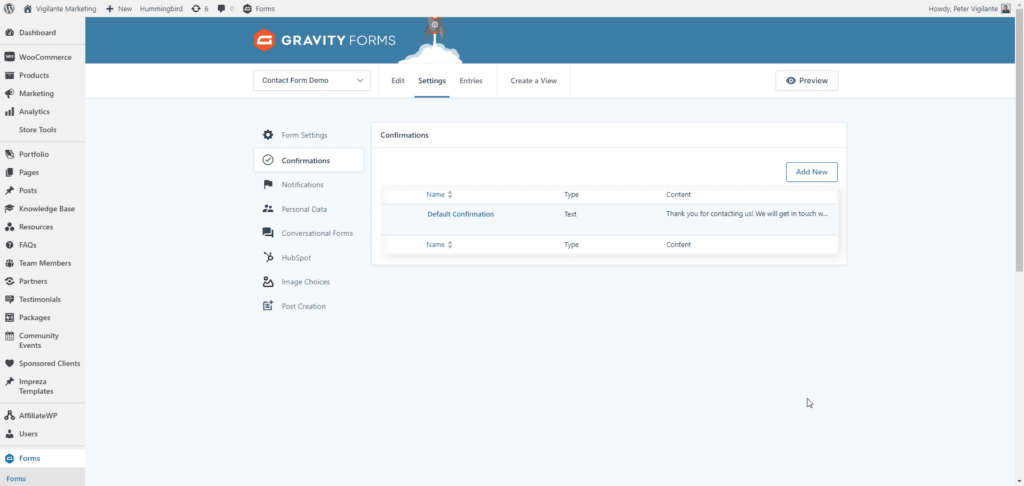
Confirmations List Page
The Confirmation List page allows you to see all the confirmations for a particular form.
Hovering over the confirmation name reveals the quick toolbar with the following confirmation actions:
Quick Toolbar Actions
- Active/Inactive: Sets the current confirmation to active use. An inactive confirmation remains available but is not currently used.
- Edit: Allows modifications to your confirmations.
- Duplicate: Creates a copy of the confirmation.
- Delete: Permanently removes the confirmation. This action cannot be undone.
Confirmation Columns
- Name: The name of your confirmation. The list can be sorted alphabetically by clicking the column header.
- Type: Different types of confirmations are listed.
- Text: Displays text entered in the field.
- Page: Links to the specified WordPress page.
- Redirect: Redirects to the provided URL.
- Content: The information included in the type you have specified (e.g., Type: Redirect, Content: http://www.google.com).
Default Confirmation
A form always needs to process one confirmation, so the Default Confirmation cannot be deleted, removed, or inactivated.
To display a custom confirmation message, edit the Default Confirmation or create a new one with appropriately enabled conditional logic. The Default Confirmation will be used if the logic fails on all other confirmations.