Have questions about paid ads, campaign optimisation, or platform features? Browse our knowledge base for step-by-step guides, FAQs, and expert insights to help you succeed.
Configuring Notifications in Gravity Forms
On This Page
A notification is a useful tool for website administrators, alerting them via email when a user submits a form. This saves you from having to frequently check the entries yourself. This guide will walk you through setting up a basic email notification for your form. As you become more adept, you can customize notifications further by adding multiple for a single form or submission, and employing conditional logic to trigger specific notifications. Let’s start with setting up a simple notification.
Create a New Notification
You will need to already have a form created to set up form notifications.
- Access the form that you want to create a notification for. This is done by clicking on Forms on the left side navigation menu, and then clicking on your desired form.
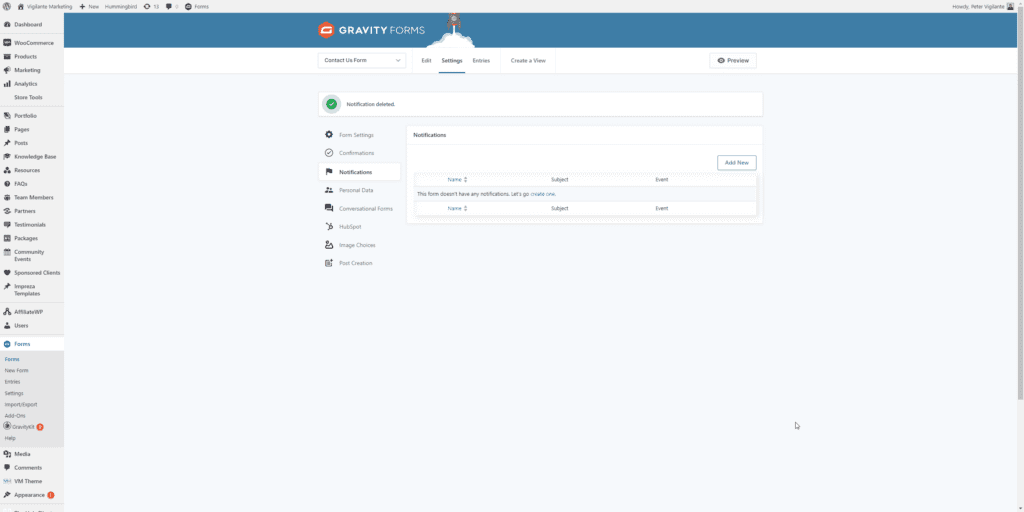
- At the top menu, hover over Form Settings and click on Notifications.
- You will be presented with a list of all notifications that currently exist for that form. By default, there should already be a single notification that sends the submissions to the admin email address within your WordPress installation. The list may be sorted alphabetically by clicking on the “Name” header. To add a new notification, click the Add New button.
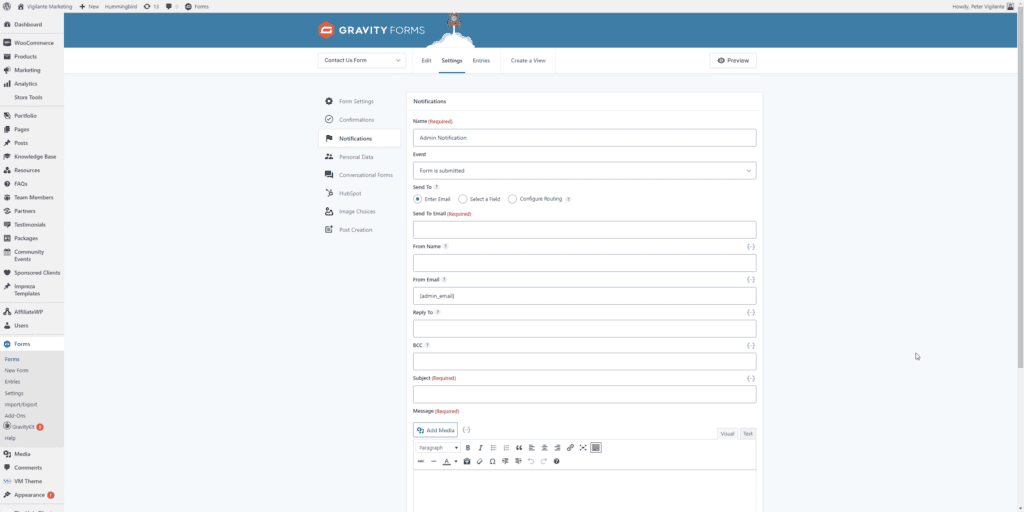
- First, pick a name for your notification. This is simply something to easily identify the notification. Any unique name will be fine.
- You will lastly want to pick an Event for which this notification will trigger. The dropdown provides a few options but you will usually want to pick ‘Form is submitted’.
Setting up Email Notifications
When configuring email notifications in Gravity Forms, you’ll encounter various settings under “Send To”. You can specify recipients using:
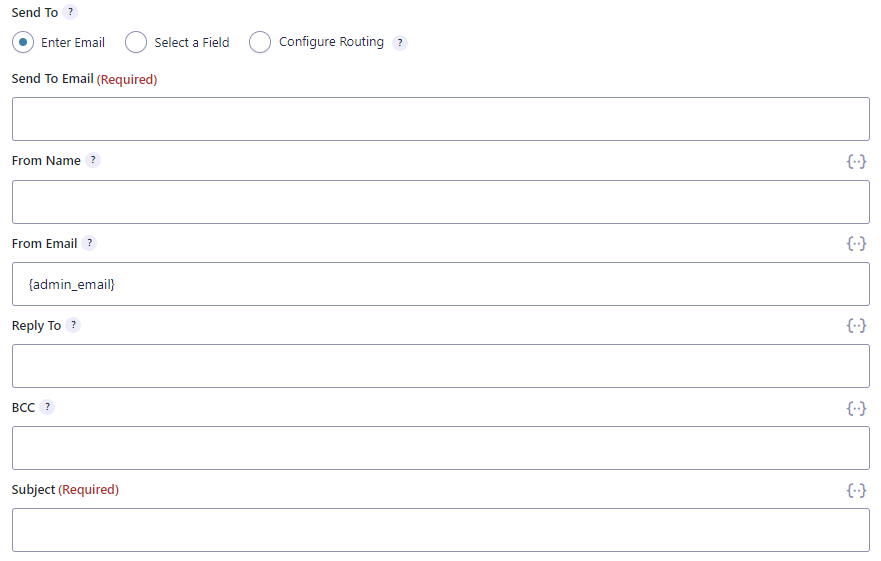
- Enter Email: Input a specific email, multiple emails separated by commas, or use a merge tag like {Email:2} to dynamically fetch the email from your form.
- Select a Field: This sends the notification based on an email field within the form.
- Configure Routing: Tailor the recipient based on form selections. Refer to detailed documentation for complex setups.
Initially, let’s focus on the “Enter Email” option:
- Send to Email: Input your desired recipient email(s) here.
- From Name: Set a sender name either statically or dynamically using a merge tag.
- From Email: Ensure this is a valid email to avoid issues. Use {admin_email} or a specific address. Note that the from email must be from the same domain as your website.
- Reply To: Set this using a static email or merge tag.
- BCC: Use this to copy emails to another recipient without the main recipient’s knowledge.
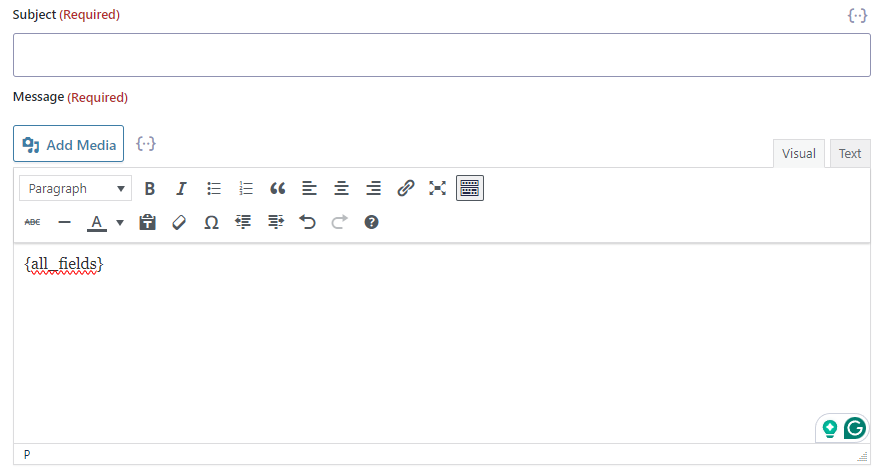
Subject and Message Configuration
The “Subject” and “Message” fields are key in notifications, as they convey the form’s content. By default, the subject indicates the form name, and the message includes the form content. Both fields allow the use of merge tags to dynamically insert data directly from your form fields.
To display all of the submitted form data, you can add the ‘{all_fields}’ merge tag.
Disabling Auto-Formatting
If you’ve customized your email format (e.g., using HTML) and want to preserve this layout, you can disable WordPress’s auto-formatting to prevent unwanted paragraph spacing.
Advanced Notification Settings
For more customized notifications, including using conditional logic to control when a notification is sent, refer to further documentation on creating customized notifications and configuring conditional logic.
Still haven’t found what you’re looking for?
Let us know and we’ll do our best to help out!