Have questions about paid ads, campaign optimisation, or platform features? Browse our knowledge base for step-by-step guides, FAQs, and expert insights to help you succeed.
Creating a new Gravity Form
On This Page
This brief guide introduces the Form Editor in Gravity Forms, your go-to tool for form creation within WordPress.
Creating a New Form
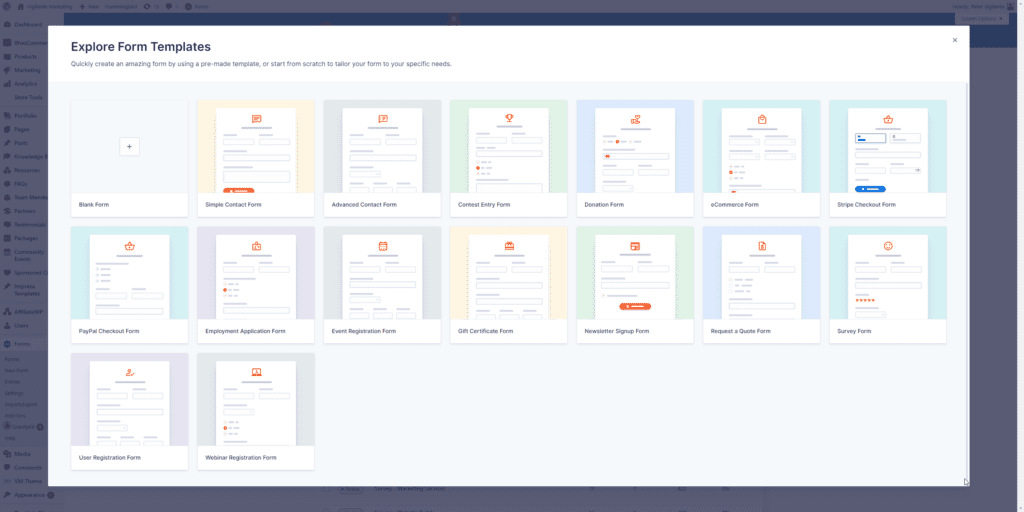
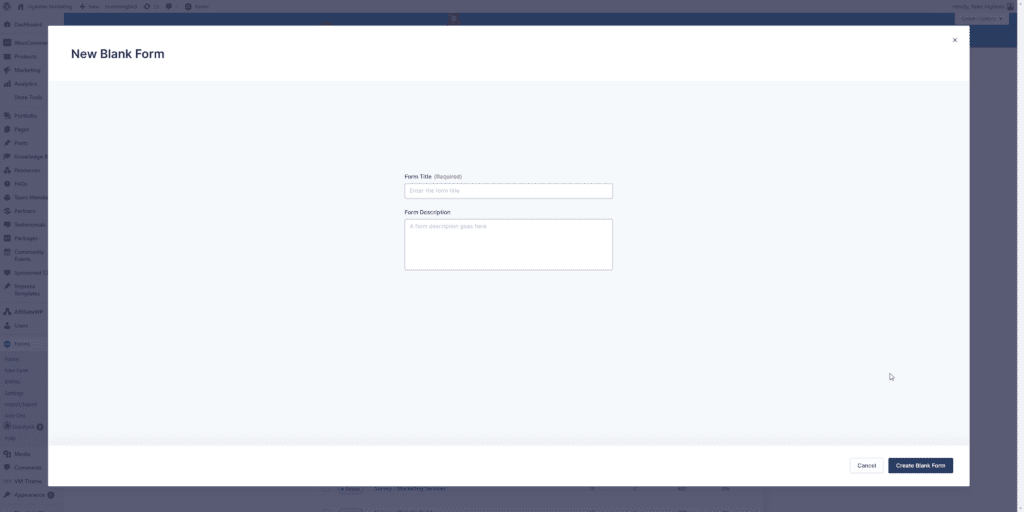
Start by accessing the ‘Forms’ menu in your WordPress admin panel, identifiable by the Gravity Forms “G” logo. Here, click ‘New Form’ to launch the form creation process. You have the option of choosing from a list of pre-made templates or you can start fresh. If starting fresh, you’ll enter a title and description for your new form—this helps in identifying and organizing your forms later. Once you name your form and click ‘Create Form,’ you’ll be taken to a blank Form Editor screen, ready for you to craft your form masterpiece!
Using the Form Editor
The Form Editor is where you’ll focus most of your design efforts in Gravity Forms. Its user interface mirrors the familiar Block Editor in WordPress, making it intuitive to use. Whether you’re new to WordPress or switching from another form tool, the Form Editor is structured to help you navigate and utilize its features effectively. Here’s a quick rundown of the main areas to get you started on your form designs.
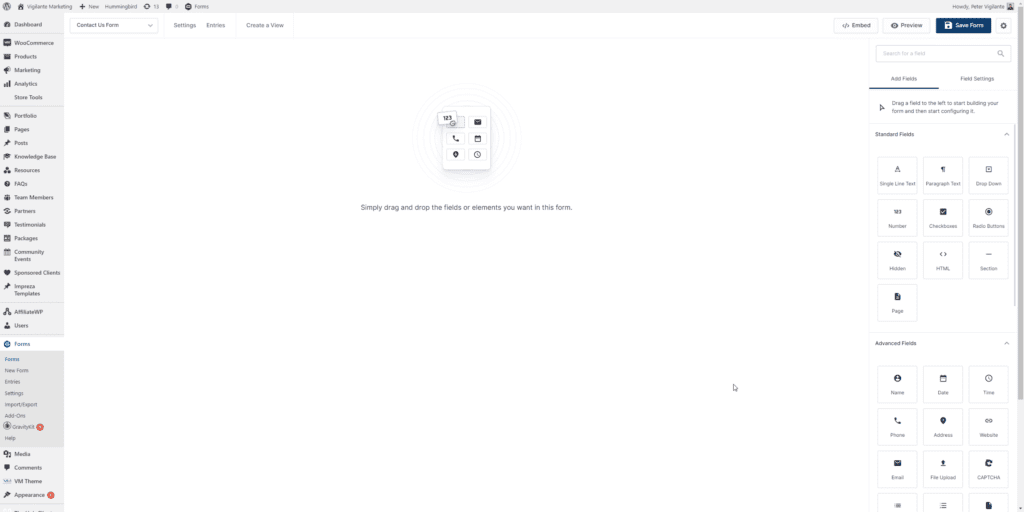
Top Bar
The top horizontal bar of the Gravity Forms Form Editor offers the following options:
- Shows you the form you are editing, and allows you to quickly switch to other forms.
- Go to Form Settings.
- Go to this form’s Entries list.
- Embed this form in a post or page.
- Show a preview of this form.
- Update the form and capture the changes you have made.
Field Library
The Field Library, located on the right side of the Form Editor screen in Gravity Forms, houses all the fields you can add to your form. It features a search bar for quick field retrieval. There are two main tabs: the “Add Fields” tab displays various field categories, allowing you to select and expand your desired category to see all related fields. When you select a field, the “Field Settings” tab automatically opens, providing specific settings for the chosen field.
The following categories of fields are usually available here:
- Standard Fields: the simple basics.
- Advanced Fields: multi-part and more complex fields.
- Post Fields: fields associated with WordPress posts, such as tags and excerpts.
- Pricing Fields: product related fields.
- More field categories may be added here by other add-ons.
The Layout Space
The main area of the Form Editor screen is where you arrange and tweak your fields. Drag and drop any field you like from the library onto the layout space. Here you can change settings, set the layout order, and even create columns
Available Form Fields
The Form Editor toolbox groups fields under a few categories: Standard, Advanced, and Post. This post is a quick reference to all the standard field types available in Gravity Forms. Note that deleting a field will also delete all entry data associated with that form field.
Standard Fields
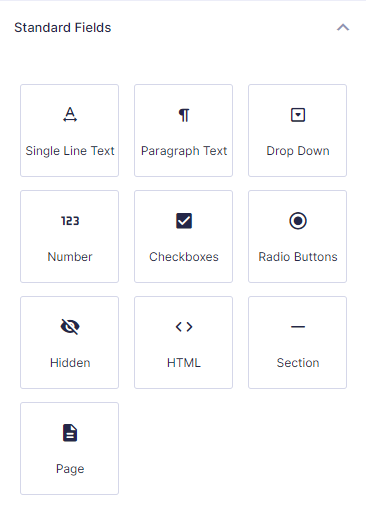
Standard Fields are basic form fields that can be customized for just about any use. These can be used to capture and store a variety of data when an advanced field is not available to meet your needs.
- Single Line Text
- Paragraph Text
- Drop Down
- Number
- Checkboxes
- Radio Buttons
- Hidden
- HTML
- Section Break
- Page Break
Advanced Fields
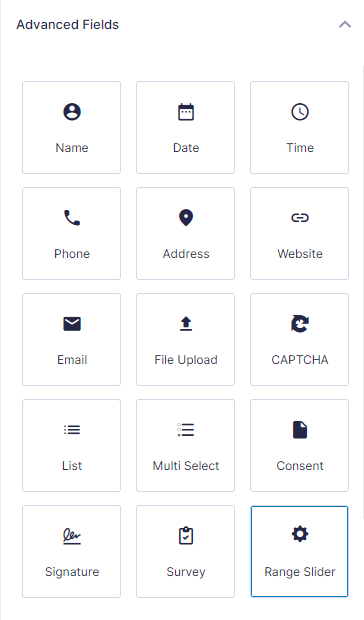
Advanced Fields are more advanced form field types with specific usage in mind. Advanced fields may actually contain multiple fields in one container. These fields make it easy to capture data such as a users Name, Address, etc.
Post Fields

Post Fields are form fields that enable you to capture data that is then used to create a WordPress Post. These fields make it quick and easy for you to create forms that allow users to submit content to your site. The result posts will be set as a Draft and will need to be published before they are visible.
Pricing Fields
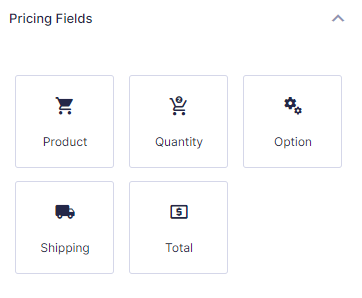
Pricing Fields are form fields that enable you to create products focussed forms. Additionally, this is where you will find Add-On specific payment collection fields, such as the Stripe Card field, and the (mostly deprectaed) generic credit card field that is still utilized for the Authorize.net Add-On.
Still haven’t found what you’re looking for?
Let us know and we’ll do our best to help out!