
Have questions about paid ads, campaign optimisation, or platform features? Browse our knowledge base for step-by-step guides, FAQs, and expert insights to help you succeed.
Add an email signature to your mail client
On This Page
An email signature allows you to automatically include a few lines of contact information (or any other information) to the bottom of every outgoing email message, allowing you to easily advertise your business or yourself.
Apple Mail
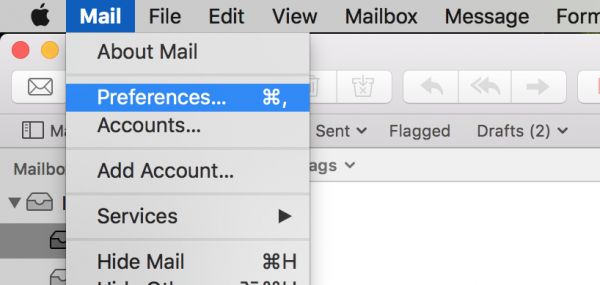
To define the default signature for an email account in Mac OS X Mail:
- Select Mail | Preferences… from the menu.

- Go to the Signatures tab.
- Highlight the desired account.
- To create a new signature for an account:
- Press the + button.
- Type a name that will help you recognize the signature.
- Uncheck Always match my default message font if you are pasting in a custom HTML signature
- Always match my default message font.
This will have OS X Mail set the entire signature’s text using the default message text font, and your signature will not only blend in well with your emails, but OS X Mail will also be able to send small and efficient text-only email messages (when you apply no formatting to any text while composing the email).
- Always match my default message font.
- Paste/Edit the signature’s text in the area to the right.
To use a signature created for another account (or for no account in particular):
- Select All Signatures in the accounts list (or, of course, the account for which you created the signature).
- Drag the signature you want to use to the desired account.
Close the Signatures preferences window.
Google GMail
To set up a signature that will be automatically appended to any emails you compose in Gmail:
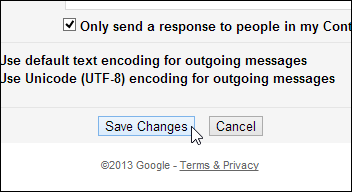
- Click the settings gear button and select “Settings” from the drop-down menu. Stay on the “General” tab, scroll down to the “Signature” section and select the option below “No signature” to turn the feature on.
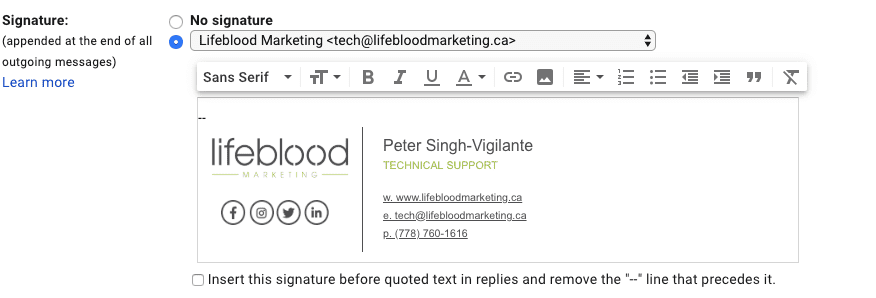
- Enter the text you want to use as your signature, or Copy & Paste the HTML Signature you would like to use.
If you have a logo, you can insert that as an image with your text or on its own. You can also add hyperlinks to text in your signature, by selecting the text for the link and clicking the “Link” button on the toolbar.
NOTE: If you want to add an image to your signature, you need to use an image that’s available publicly on the web. For example, to use your company’s logo, you might be able to find it on your company’s site and copy the URL from there. You need a web URL to include an image in your signature. If the image you want to use is not already available on the web, you can use sites like Blogger and Google Sites to create a simple website and upload your image to it. Or, you can use an image hosting service. - Click “Save Changes.”
You can edit or delete the signature manually once it is inserted into a new message.
Microsoft Outlook 2013
Email signatures are the shoes of the corporate world. Sometimes you just need a short, to-the-point one for chain replies. Sometimes you need a formal, official-looking one. Unfortunately, Microsoft Outlook’s signature options can be somewhat hard to find, buried deep in the abyss of its backstage mode for options.
Here’s how to create a signature in Outlook 2013 in five quick steps.
- Click New Email at the top left corner of the Home tab.
- Click Signature from the top panel, next to Attach Item. A dropdown menu will appear, with options to add an existing signature to the email you’re working on. Select Signatures from this menu to open a Signatures and Stationery window.
- Click New in the Signatures and Stationery window to create a new signature template.
- Compose your signature in the editing window. If you have your contact information already saved in Outlook, you can simply import all that information as a business card by clicking Business Card at the top right of the edit options.
You can add images to your signature, like a logo or banner, by pasting them into the editor or clicking the button to the right of the Business Card button. URLs will be automatically hyperlinked, but if you want to add your own link, you can click the Insert Hyperlink button on the extreme right. Click OK, and your signature will be saved for future use. - Designate your new signature as your default in the Signatures and Stationery window if you want to make sure it is included with every new message and replies or forwards you send.
If you don’t want a default signature , you can insert the signature into individual email messages by clicking Signature in the Compose window as in Step 1, and selecting the signature you just created.

Microsoft Outlook 2010
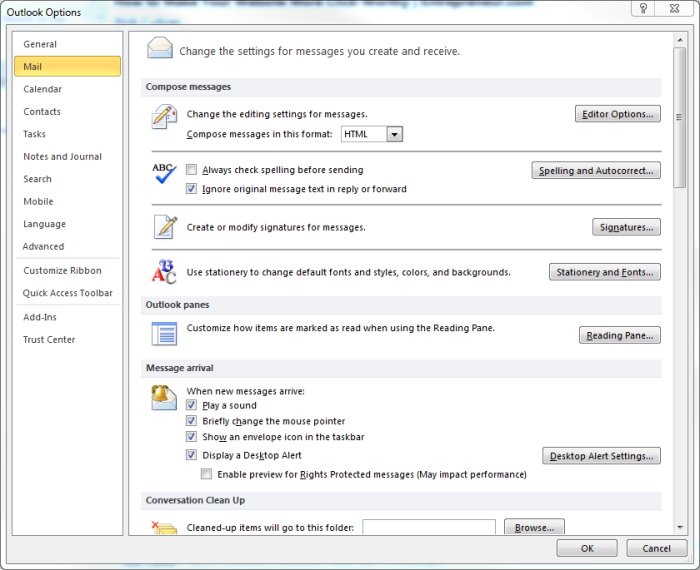
- Click “File“, then click “Options” in the left-hand menu.
2. Select “Mail” from the list of options, then click “Signatures“.
3. Replace the existing signature with your desired new one. If there isn’t an existing signature, click “New” and create one.
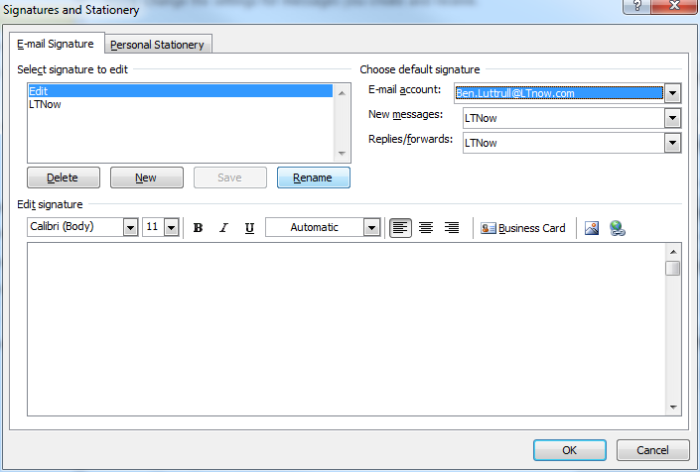
Saving your email signature in Outlook 2010
In the top-right corner of the signatures box, you will be able to select default signatures and whether to include signatures automatically on replies. Once you are done, click “OK” and your changes will be saved.
Still haven’t found what you’re looking for?
Let us know and we’ll do our best to help out!